How to use Amazon S3's transfer acceleration with django-storages
It’s easy. It cut our upload time in half. You should do it too.
Now that we’ve nailed down the first component of our data pipeline for California’s campaign cash, we’ve started moving our software to the cloud with Amazon Web Services.
But we hit a snag this week: Our new archiving process, which keeps a raw and cleaned version of each file in the daily 750MB data dump, slowed to crawl when we configured an Amazon S3 to store the files.
But then we tried “transfer acceleration.” It’s a not-so-obvious option that Amazon rolled out last month.
We found out that it’s easy to implement, and it cut our archiving time in half, from more than five hours down less than three.
How to do it
Before we began, our project was already configured to upload media files to Amazon S3 using
the popular django-storages library and Django’s DEFAULT_FILE_STORAGE setting. You can more about how to do that here.
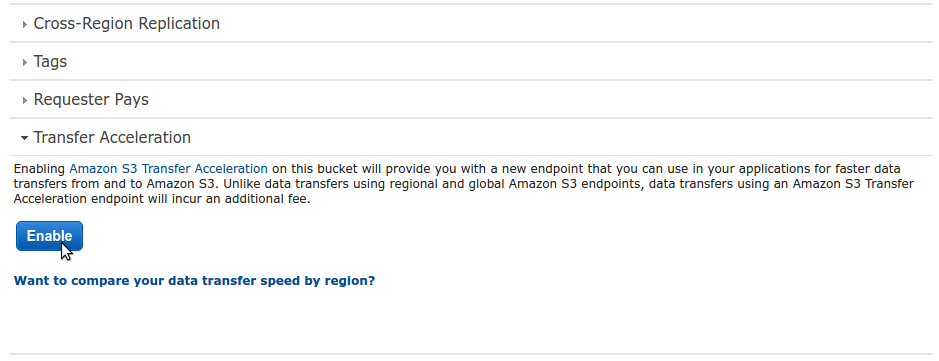
We then activated accelerated transfer for our file bucket, which can be done via the Amazon S3 console, the S3 REST API or other interfaces.
We did it simply by clicking this button in the web panel.
Once that was set, we made a small modification to our settings.py file to point django-storages at the accelerated upload service. This setting:
S3_URL = 'https://<your_bucket_name_here>.s3.amazonaws.com/'Became this:
S3_URL = 'https://<your_bucket_name_here>.s3-accelerate.amazonaws.com'That was it! All our uploads started flying up about twice as fast as before.
Faster isn’t free, however. A normal upload to S3 is gratis, but accelerated transfers now cost $0.04 per GB.
You might not like that Amazon’s now offering a walled-off toll road to its popular static file service, but, to us, it’s worth the price.